Direct copy/paste from FU - I've got a lot more writeups in the works if I'm not too lazy to do them. TOMORROW HOPEFULLY
++++++++++++++++++++++
I'm glad to be back. I haven't touched a Nerf gun in over 2 years and I'm pumped to be modding again.
Today I thrifted up a large amount of Nerf guns at a Salvation Army near me. To start with, I'm modifying the Titan I got for 99 cents. If it had the missile attachment and missiles with it, I'd probably leave it stock; however it's got neither, so I'm going to single and coupler it.
I've never seen the internals one of these in pictures or in person, or if I have, I don't remember it.
I'm going in blind!
__________________________________________
For my tools, I just grabbed the basics, a leatherman knockoff, screwdrivers, a hacksaw, hot glue gun, wire cutters, and pliers (not pictured) as well as various lights and knives for my use.

Make sure to grab your healthy beverages.

To start yourself out, begin removing all the screws from the blaster. This was a pain for me, as they were all in condition like this:

There are these four screws in this piece that locks the missile barrel on, these don't necessarily have to be removed. I opted to take them off because I didn't want them.

The screw on the right here was entirely stripped out and could not be removed.

My solution for this is to apply a wedge, in this case I used the knife to be constantly prying it open.
Then, carefully put the tip of a heated soldering iron onto the head of the screw. It will heat and soften the plastic, and the case will come apart.

Here's what it looks like after I've done that.

This orange ring is holding the case together, you can either cut and break it off or choose to gently break the glue if you wish to keep it intact.

I opted to cut it and then pry the ring the rest of the way off.


Moving onto an internals shot. Quite simple.

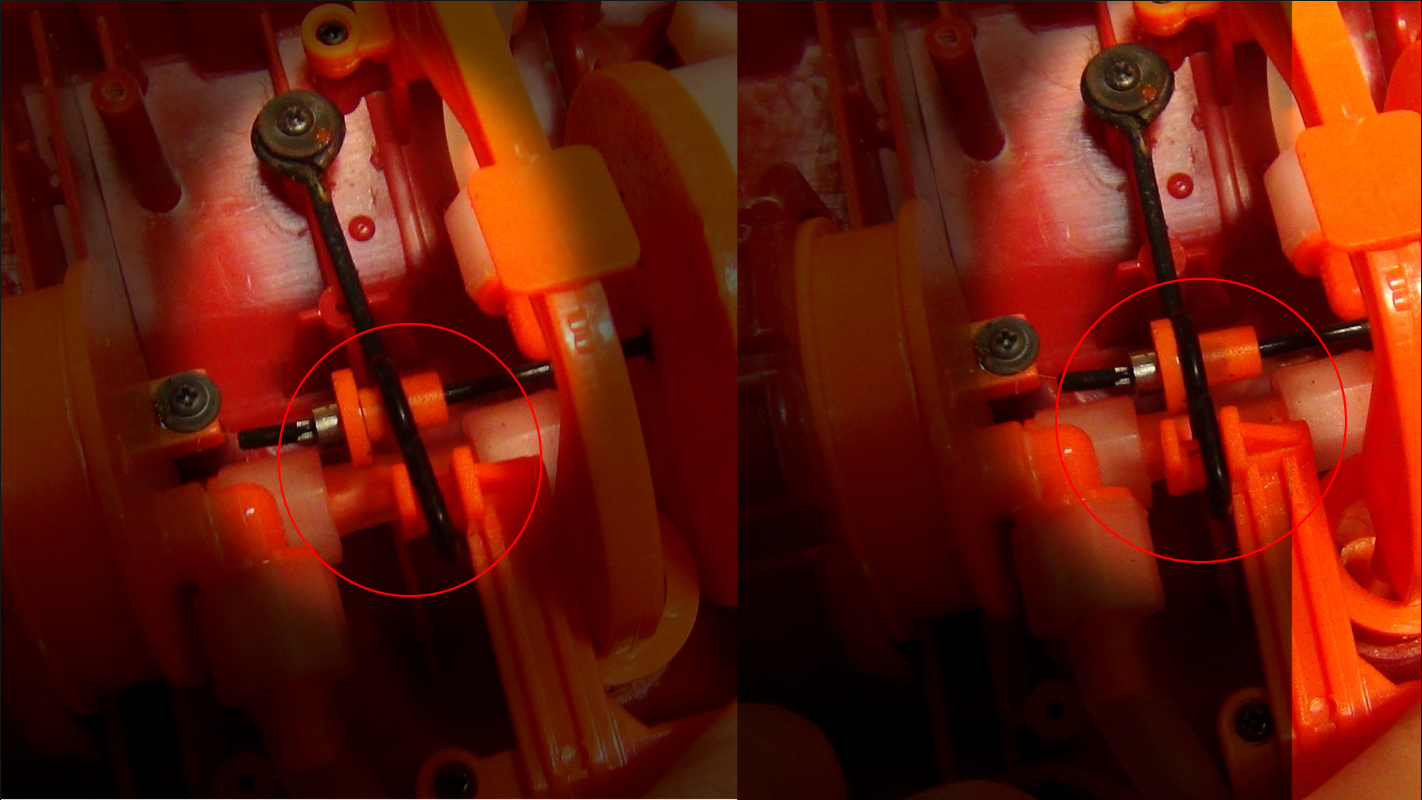
The first thing I took issue with was the trigger.

It operates by the black arm being pulling on the release pin of the air tank when the trigger is pulled.
Here's an idea of how much wiggle room it has without even doing anything, I highlighted the black arm/bar.
My first remedy for that, I put a small piece of spacer plastic that was snug enough to fit on its own (I don't have a good picture of this),
and then threw hot glue on that. That way, the black arm can't move around on its own and will start moving as soon as the trigger is moved.

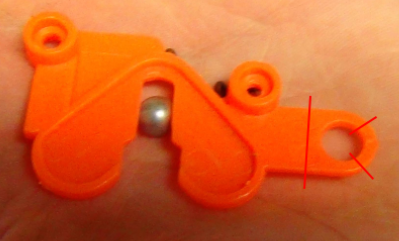
Next, I took this piece of plastic,

And pressed it down between the black bar & where it pushes on the air release pin. This removes the "Dead space" of the trigger pull, and it's a much more satisfying feel.

While I was working around the area, I removed the trigger.

This piece is a safety, and can be removed.

As well, this is the piece of plastic I used to create the spacer found 4 images back, using the following cuts:
There's another safety in the front trigger.

You'll want to remove these as they rattle like an annoying motherf***** any time you move the blaster more than an inch.
Moving to the front for the final step, saw off the air restrictor.

Grab your CPVC coupler. If you don't have one, take a dollar to the hardware store and get yourself a dozen.
My favorite adhesive process is super glue > epoxy > E6000 (my favorite sealant adhesive) > hot glue. I'll explain this.
Super glue, AKA Cyanoacrylate glue, will bond nearly instantly if it's flush with a surface. It's not fantastic for holding heavily stressed things, so I avoid using it as a general adhesive- I use it to stick something somewhere with a relatively high amount of strength while I prepare/apply epoxy and stronger adhesives.
Epoxy is the strongest adhesive out there. It's not glue, and glue isn't epoxy, too many people get this wrong - it's different. Anyways, epoxy takes a long time to cure (24+ hours to be usable in my eyes, I prefer 40+ hours before abusing epoxy bonds though) and isn't a fantastic sealant, however it's incredibly strong strength-wise.
E6000 is very similar to Goop. It has little to no adhesive value, as in if you stick two pieces of plastic together with it, let it cure, and then pull the plastic pieces apart, they're not going to stay together. However, it's a fantastic sealant, which is why I use it at this step in the process.
Finally, grab some hot glue and drench that mofo. It provides a protective casing, cools in under a minute, and will hold things together with the super glue while everything cures.
Yes, this process is incredibly overkill, no you don't need to do it, but I recommend using super glue, E6000 or a lot of epoxy, and then hot glue.
I only had super glue, E6000, and hot glue, so I just used the three.
With super glue,

E6000 which isn't visible and a hefty amount of hot glue.

Even though I do it all the time, I'm strongly advising to not put hot glue on any adhesive that isn't cured/dried yet. Super glue creates acrid fumes that are capable of stinging your eyes and nose and being noticeable for hours to days, E6000 and Goop trash your kidneys and kill your brain cells, and I'm not sure about epoxy but it smells like dog farts if you get hot glue on it which is reason enough for me.
That's my lengthy writeup for a very simple mod, but this is the first thing I've touched in a long time. Glad to be back.
PEACE
---
I also resized the images for this because HoF doesn't auto-resize them. They're a bit squished, I forget the aspect ratio of my camera. deal w/ it


